This is a very controversial personal choice. When considering choice of material. Read any DIY forum and you can spend hours researching.
My personal choice boiled down to two main factors. I made those my priority. Then built around that:
1. Weight considerations
2. Your noise/squeak tolerance
Don’t let your desire for a certain look override your judgement.
Next, I believe many DIYers gravitate toward materials they have worked with previously. Or materials they already have the tools for. Materials that are readily available at local big box stores at a reasonable price.
This means, many are predominately using wood framing, and wood products. Materials that are used in and around home construction. I have seen some using 3/4 inch tongue and grove boards as their interior finish.
Commerical RVs of the past and even the present use wood framing for many things. In my experience, wood even glued, eventually starts squeaking. Do you really want to hear that while driving down the road. I tried to build with the least amount of mechanical connection as possible. Welding as much as possible.
Some alternatives:
8020 bolt together Aluminum
Welded Aluminum Tubing
Welded Light gauge Steel tubing
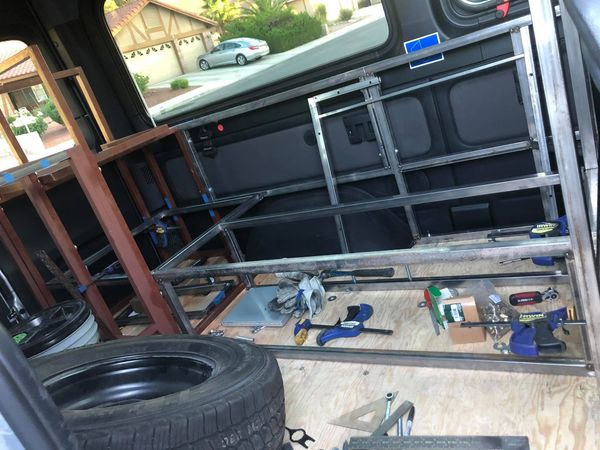
I opted to weld light gauge square steel tubing for a skeleton support structure. I couldn’t afford aluminum once I factored in having someone weld it, or buying the equipment to weld it myself. I am not set up for that. I had everything to work with steel.
I used 1/16 wall, 1×1 inch and 3/4×3/4 inch tube.
I had no desire to use bolt together 8020.
I made some weight comparison. Steel against wood framing. It was nearly a wash. I went as light as possible when making finished interior panels. Most of which are removable. Making them handy for service or repair situations.
I believe my build is lighter than many I see built with heavy would products. I might not have that same visual appeal though.
My tubular skeleton was fabricated into roughly 3 ft cubes. Base cubes and upper cubes. Then some others to tie in overhead storage structural support, bed, etc.
The bottoms were bolted to the floor using custom anchors attached to factory holes in the vans seat tracks. The tops were stacked on top. These modules were made to fit through the vehicle’s doors.
Brazed in Rivnuts were strategically placed. Then all modules were bolted to one another.
No anchor points were used into the vehicle walls or ceiling. The original factory interior was retained through-out. With all the glass in the passenger version I had, I felt insulating was a waste of time, money, and effort. I had no intentions of camping in extreme hot or cold temperatures anyway. Two years of use later. I would make that same choice again.
UPDATE: Two years later, using the completed build traveling and camping. This proved to be a very solid structure and did not exceed any weight concerns.
I do note. Precise, design and fabrication, is critical for many things. A welded project is very unforgiving for tweaking and modifying. Not for everyone for sure. It does help if you have prior steel fabrication and welding skills.

![]()