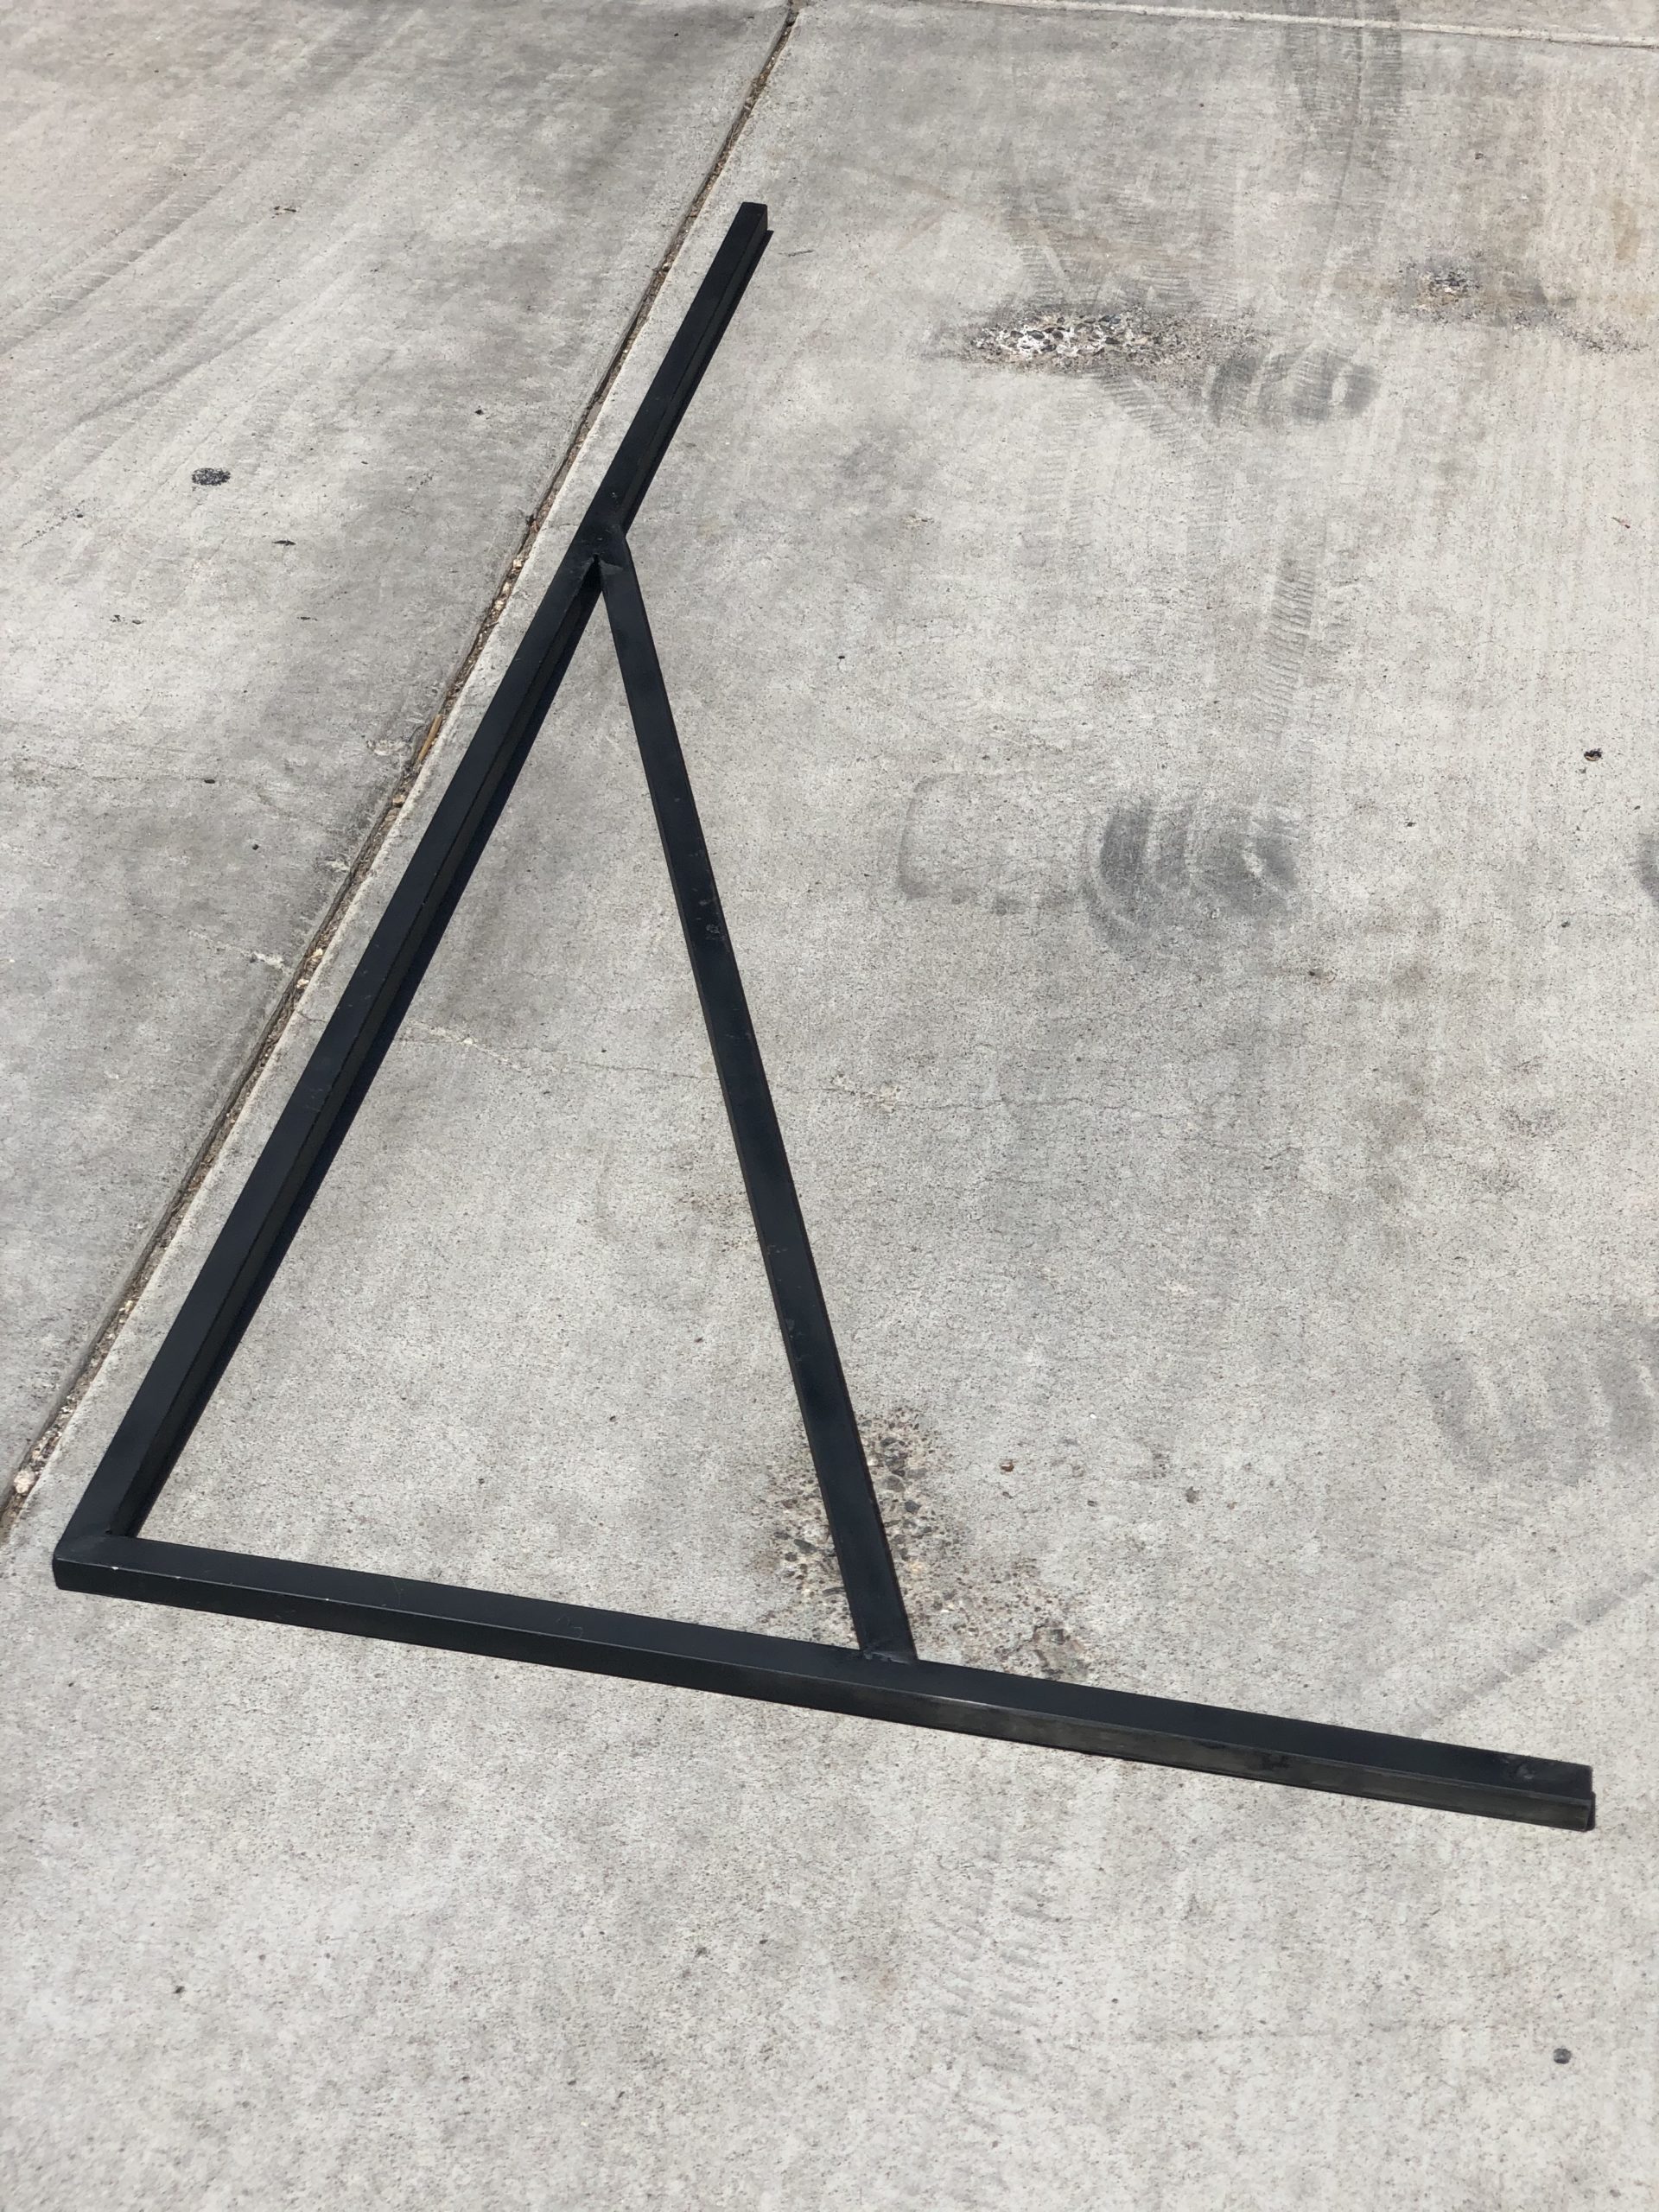
A Giant Square is one tool you may have to fabricate yourself. If they are out there on the market to be purchased, I couldn’t find one.

On my builds/conversions in the past. On trailers or vans. I quickly learned you might as well chuck your bubble level or string type Plumb Bob.
Both are useless in a trailer or van that is not sitting level. Other than the level might be good as a straight edge. To attempt to level a vehicle each time you worked on your project. That would be impracticable and counter productive.
So….in your build or conversion, your point of horizontal reference is always your floor. Even if it is off level slightly or even off level to a large degree. Walls and partitions have to be 90°’s in all directions to the floor.
A square is the solution. A common carpenters framing square can help but for full height walls, and partitions, you will want a square that nearly matches your highest useful working height. With curved ceiling corners you may have to trim the square to your own preference.
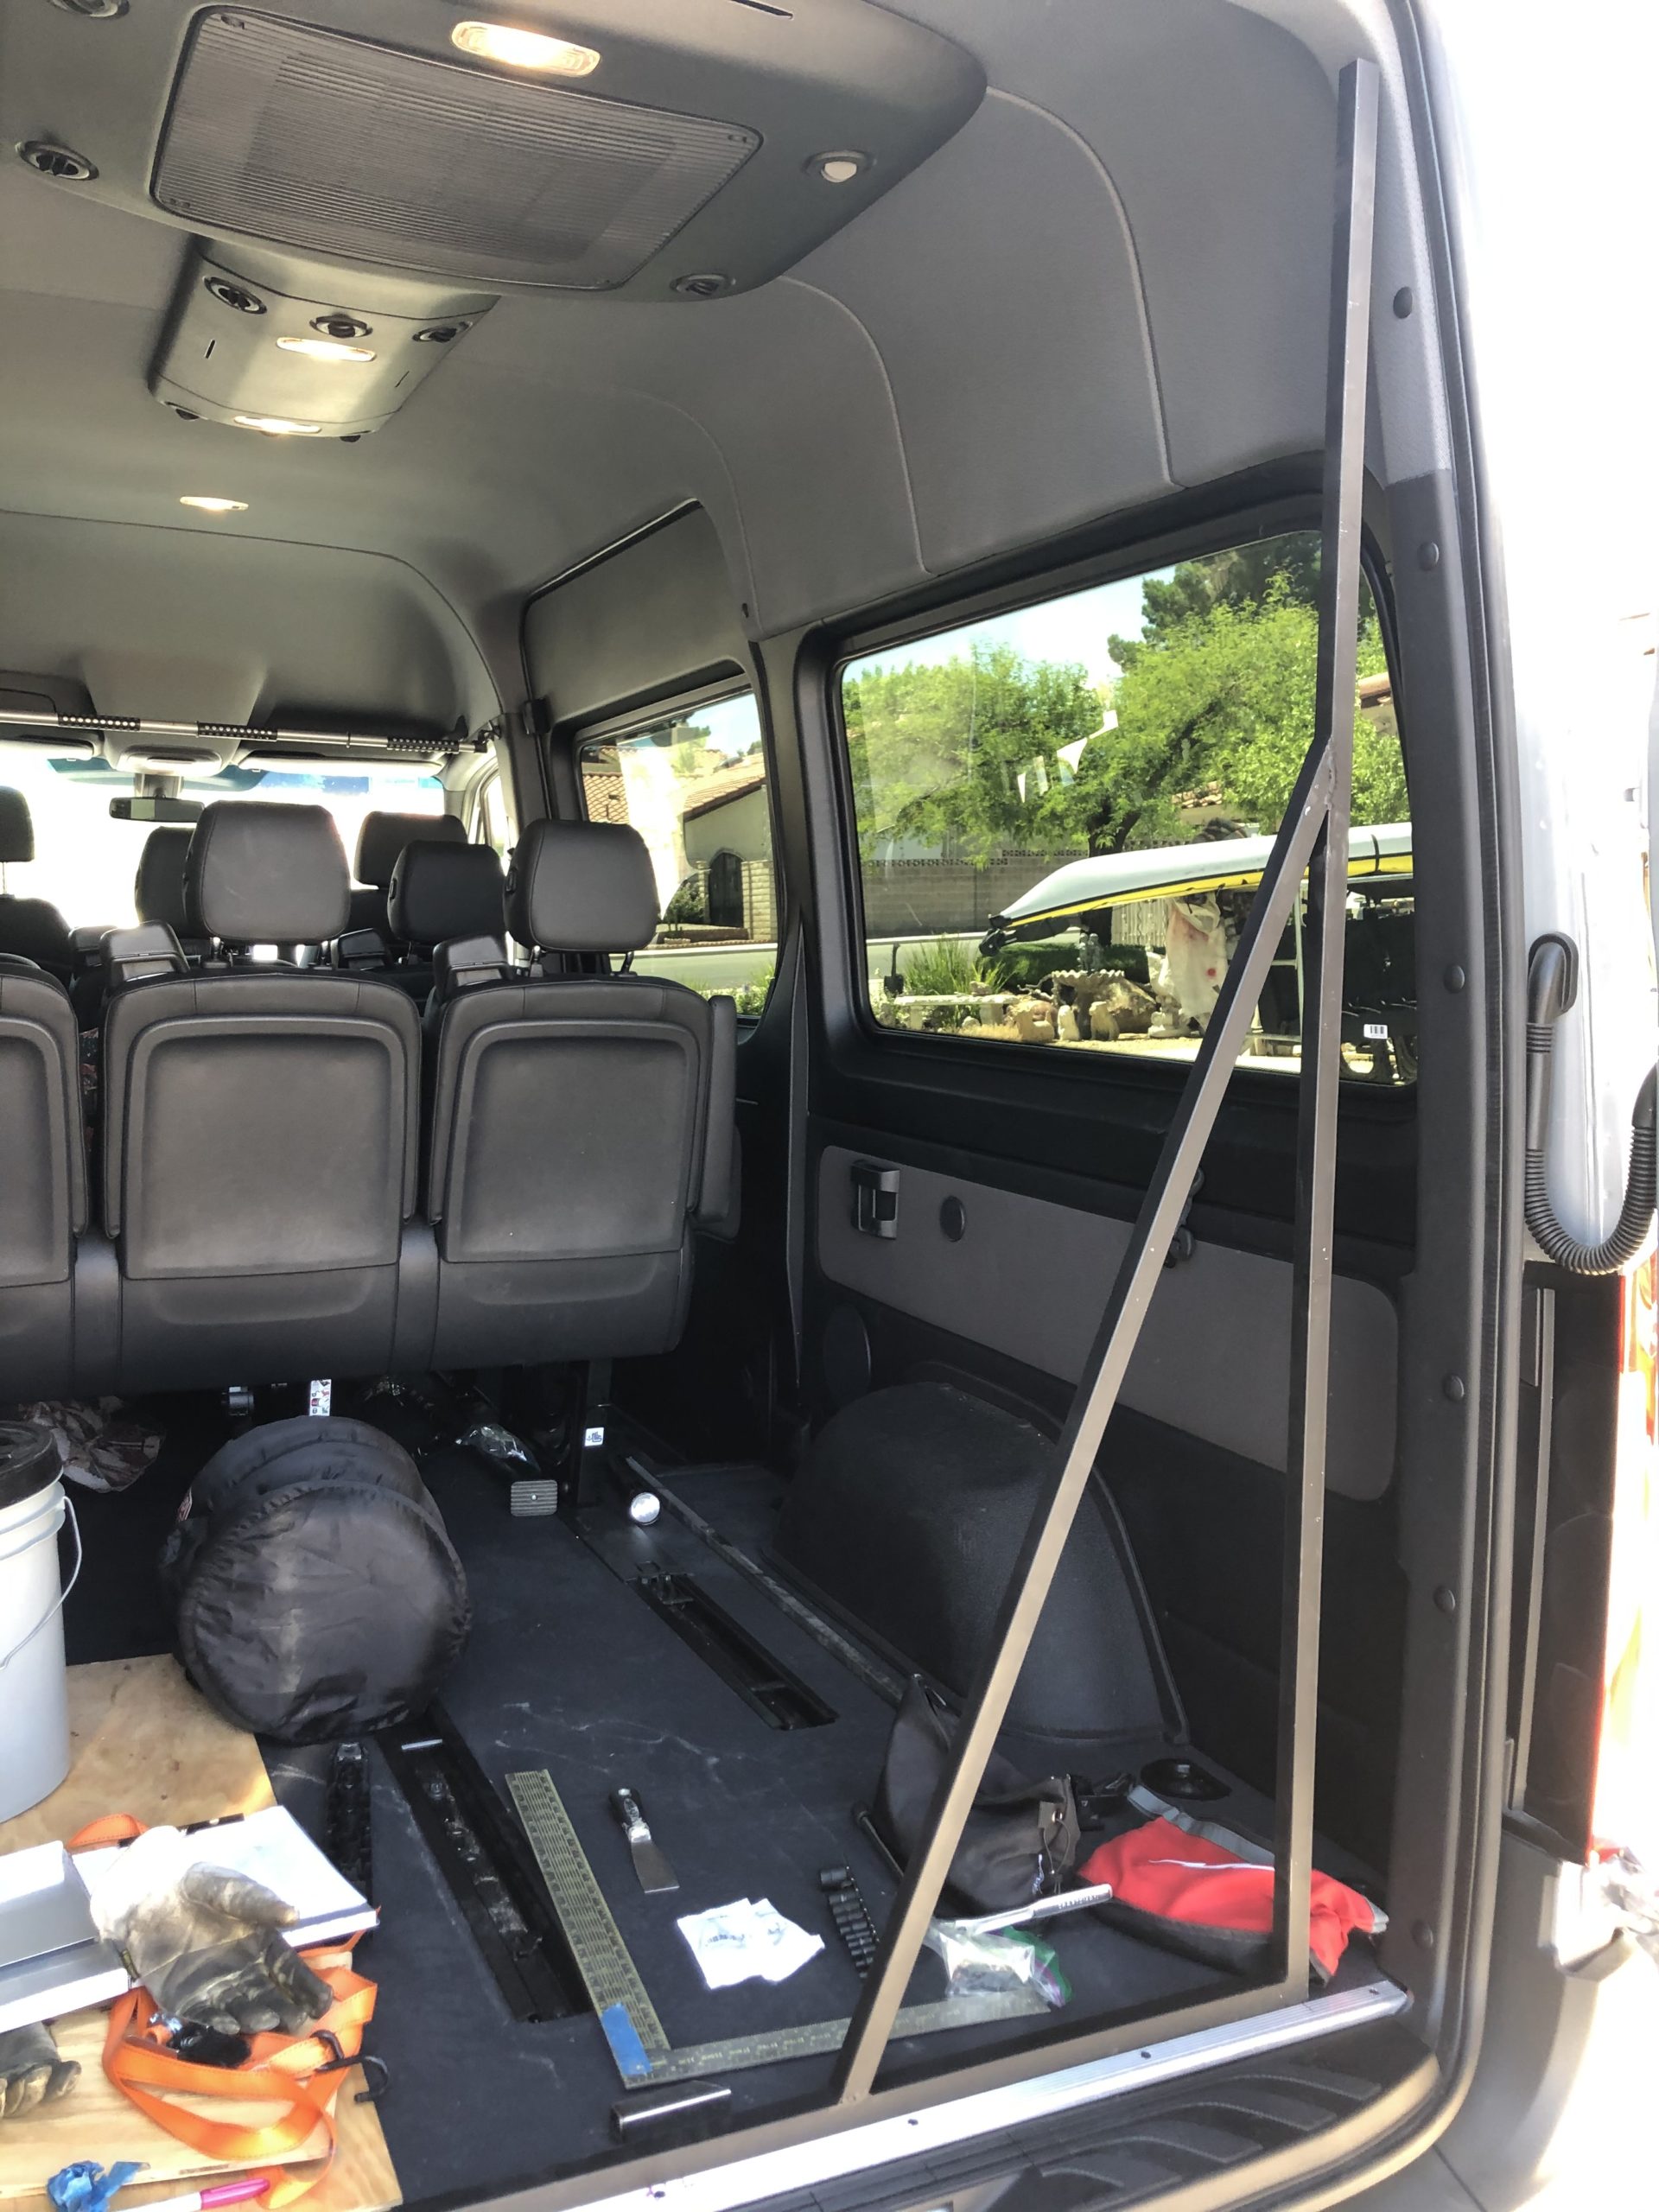
For my High Top Sprinter Van, I fabricated my Giant Square at 70 inches x 34 inches. That is slightly less than the rear door opening height.
I used 1×1 x 1/16 square steel tubing. My last one was made of wood. But the wood ones can get out of square just by warping. But 2×4’s and triangles of plywood work fairly well.
I bought the tubing new at a local steel retailer. You can buy it at Home Depot or Lowe’s. But Home Depot or Lowe’s is going to cost you more than double. I have about $18 in mine. $22 if you don’t use the scrap left from a 20 ft length.
Fabricating 2 of them will even be more helpful for setting your walls.
You will find you can drill a couple holes thru the base. Temporarily screw them to sub floor. Use clamps to hold things 90° the floor, and clamp on extensions if need be. These make a great second set of hands if you are working alone.
Other uses are for taking measurements to replicate a curve. The Giant Square can be set up to represent an imaginary vertical line, perpendicular to the floor. You then have a valid vertical to take reference measurements, and transfer the dimensions to a drawing, or on to something you need to cut.
Need a horizontal up high, something parallel to the floor? Use your Giant Square to get your proper vertical, then clamp your normal framing square on to your giant square, so you have a 90° with the smaller framing square.
When welding mine, I clamp it to the outer edge of a 4×8 sheet of plywood to get a good 90° angle.
Cut the two tubing ends, that meet to make the 90° angle, at 45° angles. Clamp them to the plywood to get a true 90° while you are welding (assuming you have a square piece of plywood).
Also cut your metal brace,. Then weld all the exposed joints. Un-clamp and flip the square over and finish welding the other side. Clean up the welds and any sharp pieces of metal with a grinder. I file the open ends of the tubing since they are often very sharp if you use an abrasive cut-off saw.
I hit my fabricated square with flat black paint and called it done.
![]()

